Finally, I managed to compile a photo tutorial for the
wavy shell blanket.
Pattern
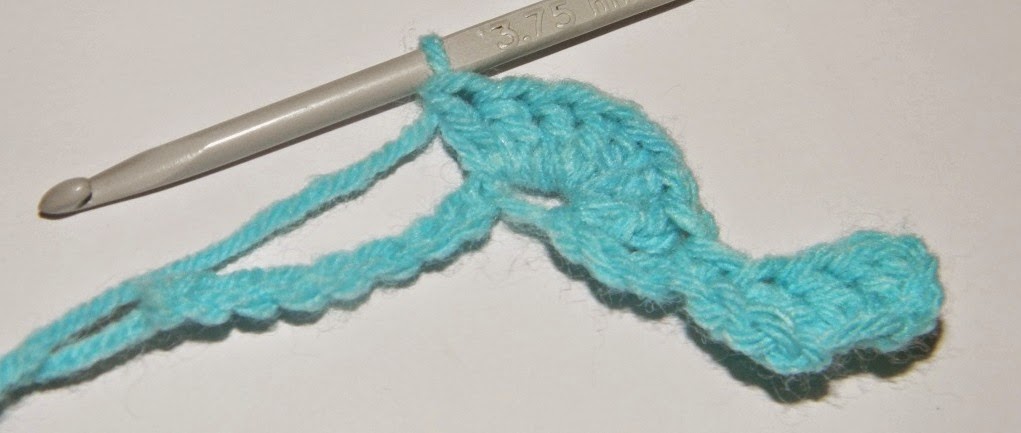
Cluster
Work in next 7 stitches. *Yarn over, insert hookin next st, yarn over and pull up a loop, yarn over and draw through 2 loops on hook; repeat from * 6 more times, yarn over and draw through all 8 loops on hook. ( Refer images )
The no of chains pattern is 20, 28, 36, 44, 52, 60, 68, 76, 84, 92, 100, 108, 116, 124, 132, 140, 148, 156, 164, 172, 180.......
I have made a sample with 20 chains. For the blanket you can increase the number of chains.
Chain 20
Row 1 : 3 dc in 4th ch from hook, skip next 3 chs, sc in next ch, *skip next 3 chs, 7dc in next ch, skip next 3 chs, sc in next ch, repeat from * across to last 4 chs, skip next 3 chs, 4 dc in last ch., turn
Row 2 : Change yarn color, ch1, turn, sc in first dc, ch3, work cluster, ch3, *sc in next dc, ch3,work cluster, ch3, repeat from * across to last st, sc in top of beggining ch.
 |
| Cluster starts here |
 |
| Cluster stitch completed |
Row 3 : ch1, turn, 4 dc in first sc, sc in next cluster, *7dc in next sc, sc in next cluster, repeat from * to last sc, 4 dc in last sc.
Repeat row 2 and 3 with different color yarn.
Note :
You can make 5dc or 9 dc too, Accordingly, adjust the number of chains.
For the blanket, I have used 5 dcs.
~Gaya3


.JPG)